¶ Virtual Key Setup
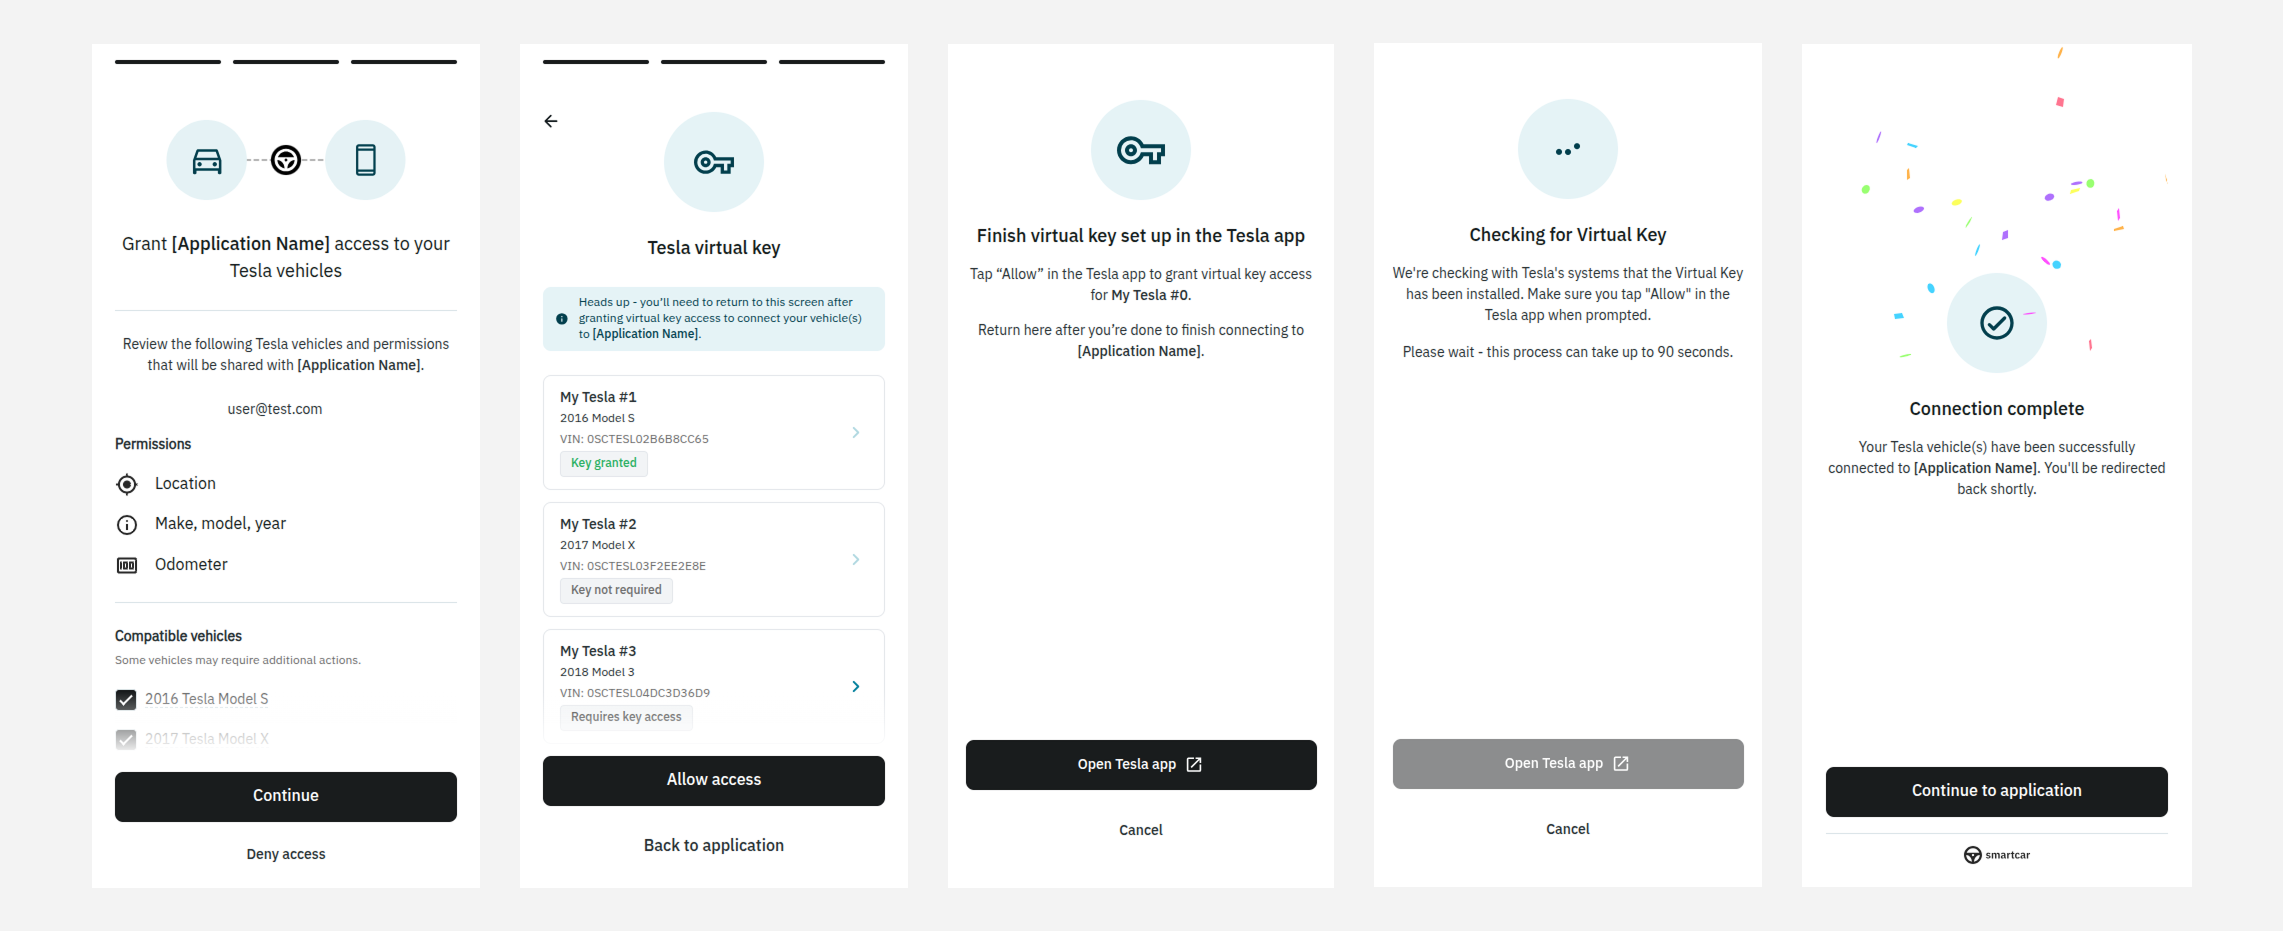
To enable FlexCharging to manage charging for your Tesla vehicle, you may need to set up a "Virtual Key." This one-time process grants FlexCharging the necessary permissions to control charging on your behalf. This guide walks you through the steps to create and assign a Virtual Key for your Tesla vehicle.
Key points:
- A separate Virtual Key is required for each Tesla vehicle.
- Virtual keys are required for all Model 3: Instructions
- Virtual keys are required for all Model Y: Instructions
- Virtual keys are required for 2021+ Model S: Instructions
- Virtual keys are required for 2021+ Model X: Instructions
- Virtual keys are required for 2023+ Cybertruck: Instructions
- The setup process only needs to be completed once per vehicle.
- You retain full control and can revoke FlexCharging's access at any time.
- Virtual Key status can be checked at any time from the Tesla infotainment screen under Settings, Locks.
Note : Setting up a phone key may require being physically near your Tesla.
¶ Set up on mobile


In the process outlined above, you will be redirected to the Tesla App for approval.
¶ Set up on desktop
If you open this on a Desktop you will be prompted to scan the QR code which in turn opens up the Tesla app and prompts them to add a Virtual Key. You will need a mobile device
- Launch the Tesla app on your mobile device
If you do not have the Tesla Mobile App, download and install the app from your mobile phone app store. Launch the app and follow the sign-up instructions to create an account.
If you already have the app installed, launch the app and proceed to Step 2.
2. Setup a Phone Key
To set up a phone key, tap on the Set Up button in the Phone Key tile in the Tesla mobile app's home screen (highlighted in Image 1 below).
If a Phone Key is already setup proceed to Step 3.
Note : Setting up a phone key requires being physically near your Tesla.
Image 1
3. Finish Setup
When the phone key is successfully set up, navigate to this URL: https://www.tesla.com/_ak/smartcar.com and tap on the Finish Setup button.
In some browsers, navigating to the above URL launches the Tesla App. If that happens proceed to Step 4.
Note: Depending on your browser, the Tesla App may not open upon tapping the Finish Setup button and a pop-up will be displayed instead (highlighted in Image 2 below).
If this happens, use the OPEN button that is displayed in the browser to launch your Tesla app. Otherwise, manually open the Tesla app.
Image 2
4. Approve SmartCar access to your vehicle
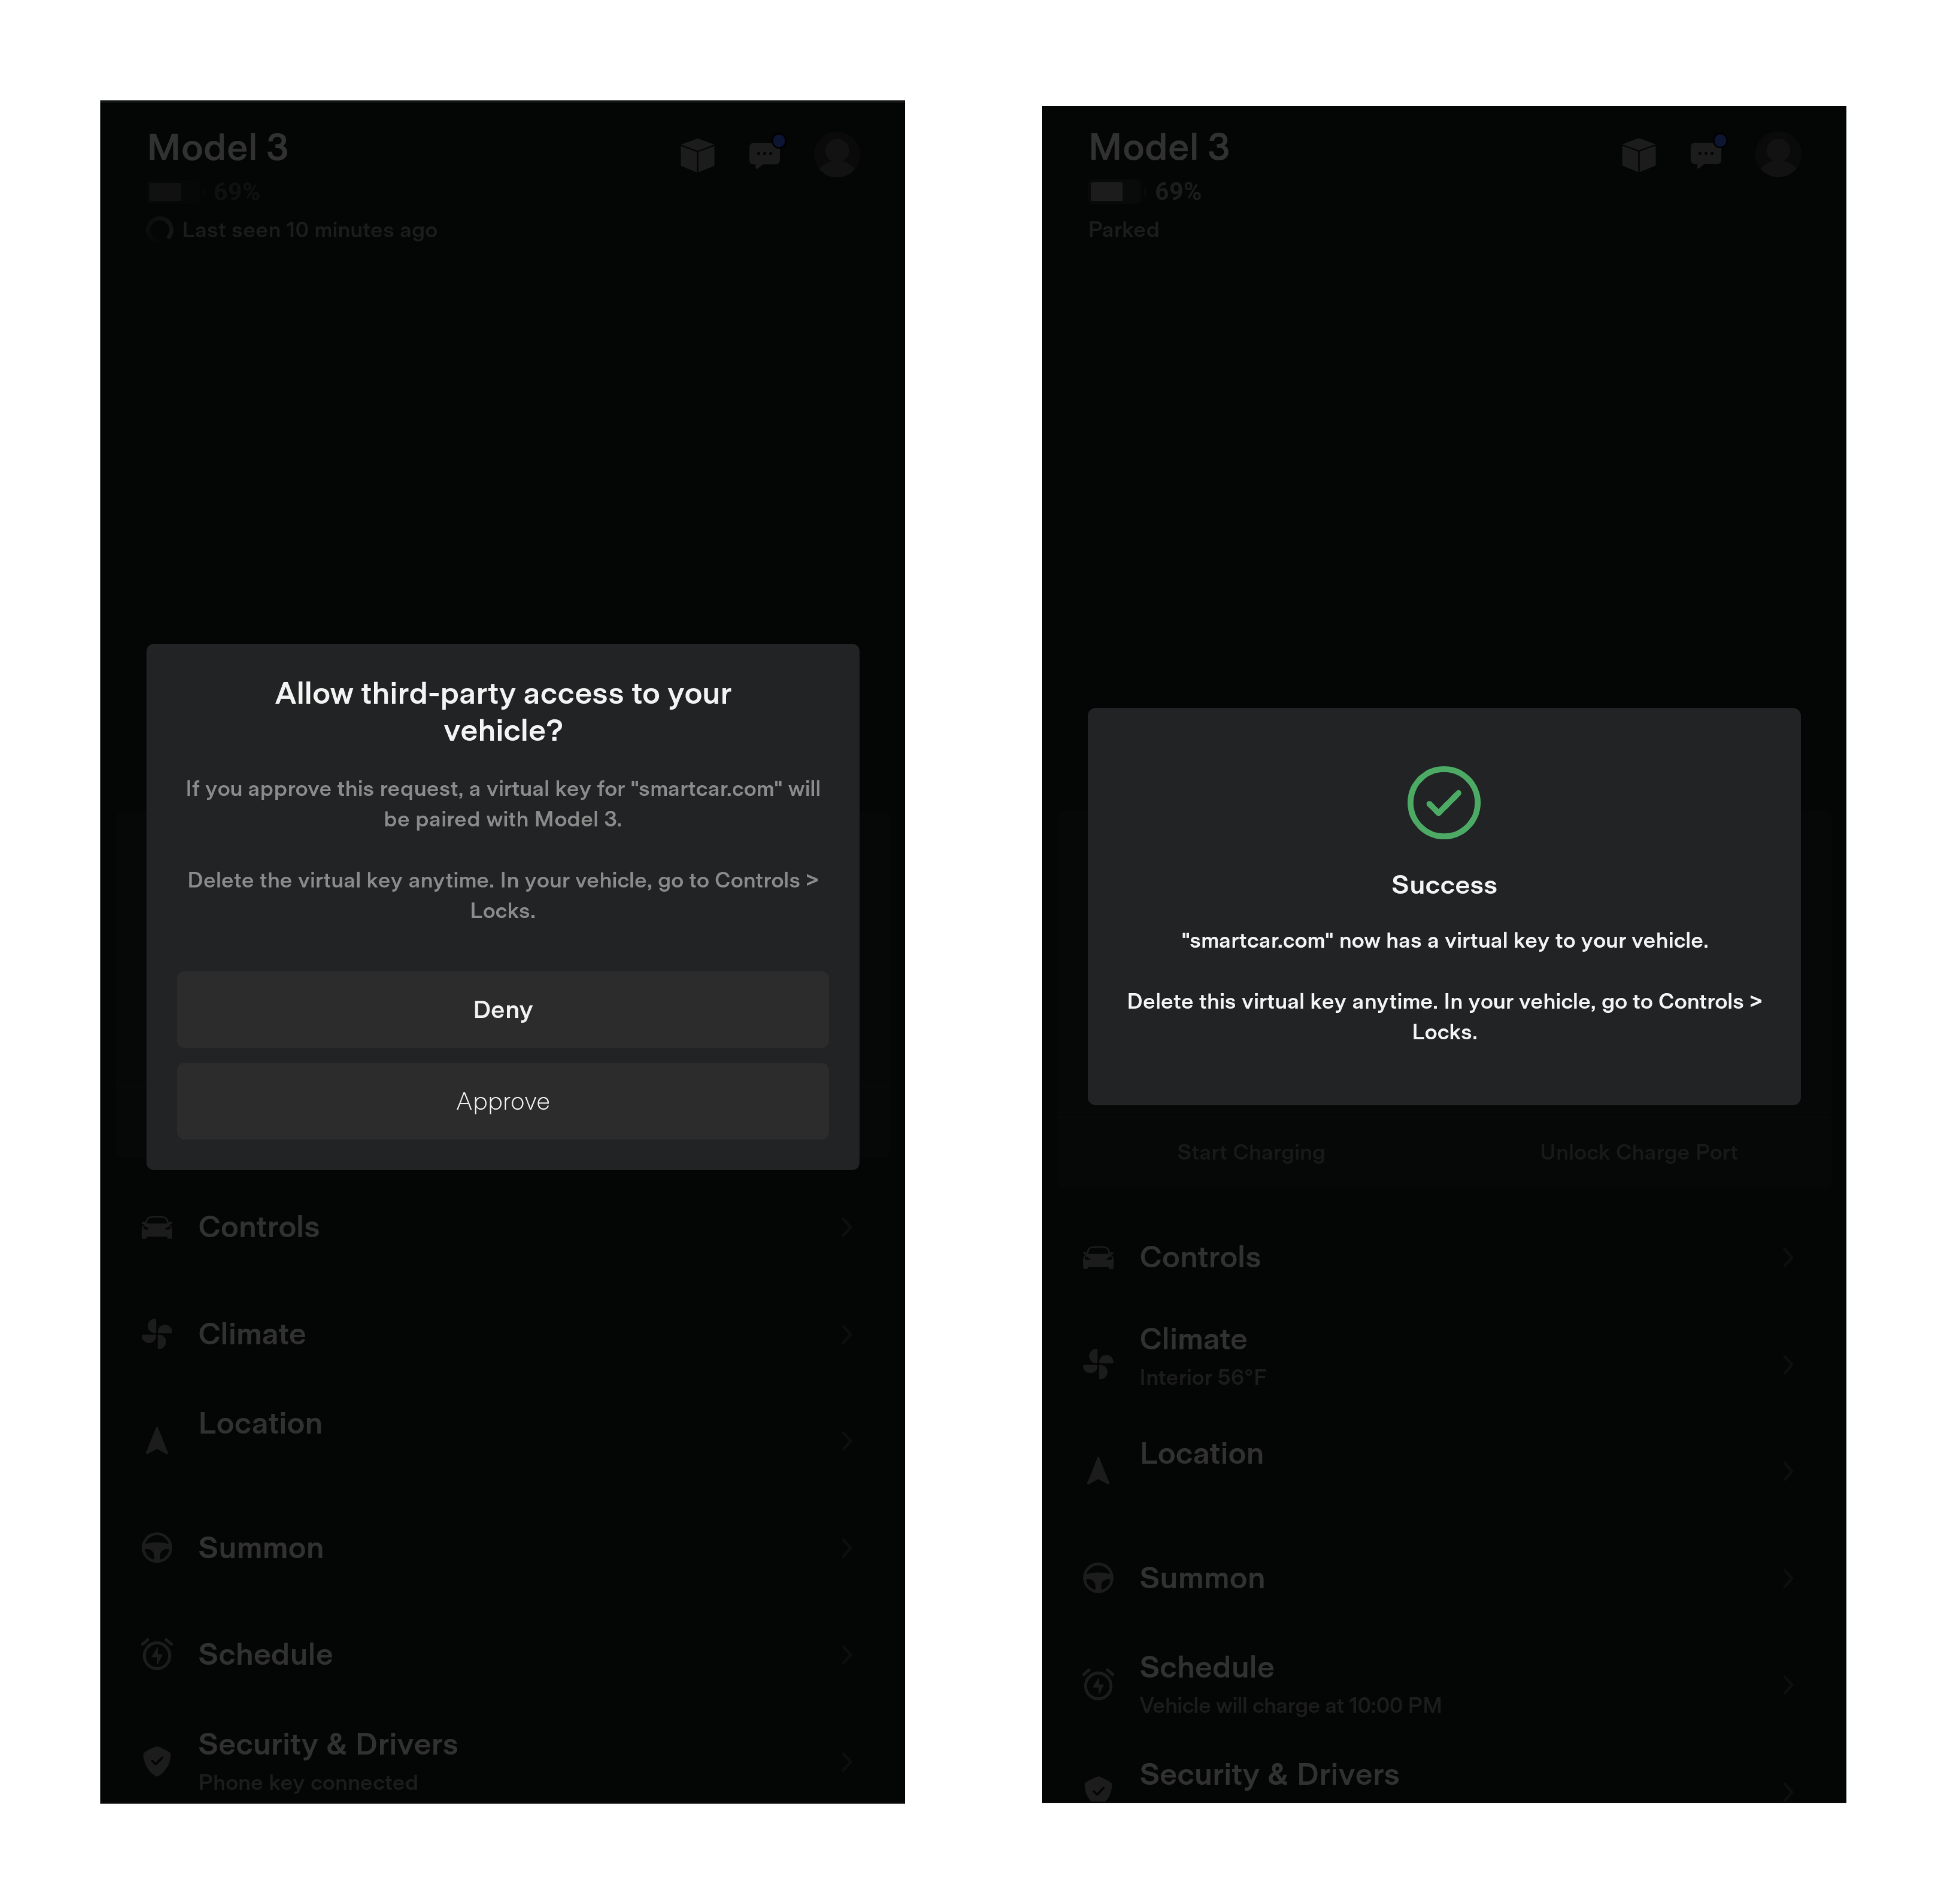
Once the Tesla app launches (after tapping the Finish Setup button), it should display a prompt requesting third party access from smartcar.com (Image 3).
Upon seeing the prompt, tap on the Approve button to complete setting up the virtual key.
Image 3
¶ FAQ
If my users have more than one Tesla on their account, will they need to add the virtual key to all of their vehicles?
- Yes. You will need to add our virtual key to each vehicle on the Tesla account.
Does the user need to be next to vehicle when adding a virtual key?
- Owner accounts can add a virtual key remotely.
- Driver accounts need to be in bluetooth range in order to add a virtual key
Why are my users are seeing a location sharing notification on their navigation unit?
- With the recent changes to data access, vehicles will transmit their live location if your application has requested access to location data. This notification was put in place by Tesla to ensure transparency for owners about what data is being shared and with whom.